Blog
Making a Pick & place machine, part 2
As we told you in anearlier blog postwe are currently trying to make a Pick & Place machine out of a Shapeoko CNC mill.
To make a P&P machine usable, there is one very important thing: It needs to have a home to go to. A home on a P&P machine or any computer controlled machine is a known position to start from. In a CNC machine this is usually a corner where all axes are at their minimum or at their maximum, and on our machine this is at the front left corner with the head in its highest position. To the machine this is known as 0,0,0. All X and Y movement are running on the positive side of these axes and the Z axis is moving on the negative side.
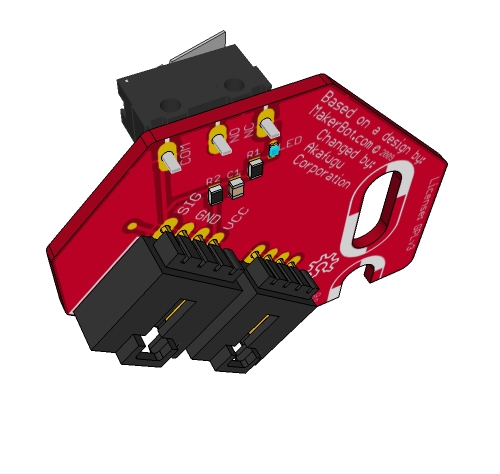
The shapeoko doesn't come with limit switches (the base model is only around $300), so we decided to make some ourself. Milling is a quite new thing for the Open Source Hardware community, 3d printers have come a lot further. Over at the Makerbot site they publish all their hardware designs. They have a mechanical endstop that would work well for our Shapeoko. The only problem was the form factor of their board as it is specially tailored for the Makerbot hardware.
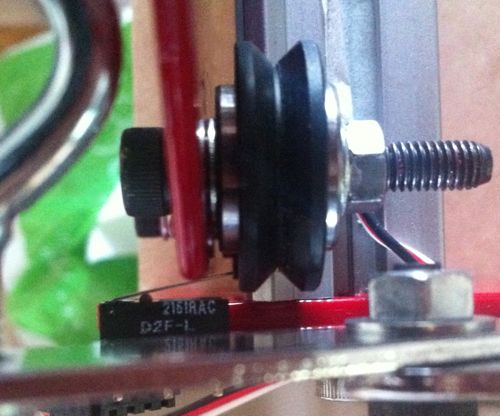
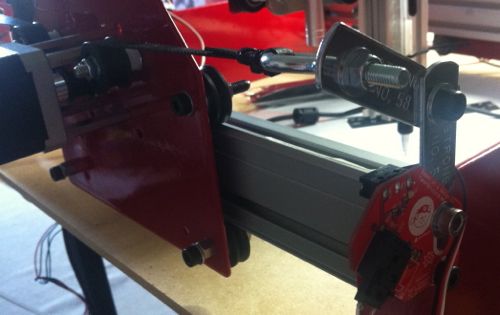
On the Shapeoko the perfect place would be to mount the three (3) switches on the endplate and motor plates. This way we can use the other motor plate to activate the switch. For the Z-axis the actual switch is extended out from the PCB with a piece of wire and mounted to the backside of a Makerslide
Here are some pictures on how it can be mounted. Important is also to filter the signal so we don't get false positives, this is done with a low pass filter consisting of a resistor and a capacitor.
All files are available on our Github site.
We haven't put this design in our shop, but if you are interested in buying a 3-pack of these with all the SMD parts already pre-mounted, please don't hesitate to send us an email.