Blog
Reprogramming the Akafugu Nixie Clock and Simpleclock

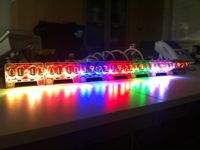
New firmware updates are available for both our
Nixie Clock and nullFollow these instructions to upgrade!
First, a rundown of the new features:
The Akafugu Nixie Clock:
- Improved display multiplexing routine for better display brightness
Simpleclock:
- Date and time setting
The new Simpleclock firmware is courtesy of our friend William Phelps. He is also hard at work adding even more features to our VFD Modular Clock (if you are interested in trying out the current code, which is very stable by now, get it from github.)
Note that the procedure for programming the VFD Modular Clock is different, and we'll get back with information on that at a later time.
Step 1 - FTDI Adapter
You'll need an FTDI adapter to program the Akafugu Nixie Clock or Simpleclock. The same adapter can be used for both, so you'll only need one.
There are many versions available, so if you already have one, you can probably use it directly. It should have a 6-pin female header. If you don't already have one, you can get it from our store.
The 6 pins on an FTDI adapter are normally labelled as follows: DTR - RXI - TXO - VCC - CTS/GND - GND
Step 2 - Setting up Drivers
The FTDI adapter requires driver installation on all supported OSs, they can be downloaded from the FTDI webpage.
You will need a USB mini-B cable. Plug the cable into your computer and attach the mini-B connector to the FTDI adapter. You should see the LEDs light up briefly.
The first time you connect the adapter, your computer will assign a serial port.
On OS X, the serial port will typically look like this: /dev/tty.usbserial-A700ft5E
On Linux, the serial port will typically look like this: /dev/tty.usbserial-A700ft5E
On Windows, the serial port will typically look like this: COM5
More information is available here.
Step 3 - Setting up Arduino
If you do not already have Arduino installed on your computer,follow our guide.
If you already have Arduino IDE version 1.0.1 or later installed, you should first download and install our library package:
(The easiest place to install libaries is in the Arduino/libraries folder located in your documents directory.)
Next, it is neccesary to edit the boards.txt file located in hardware\arduino inside your Arduino directory in your favorite text editor. Scroll down to the bottom, and add the following at the very end of the file:
