Modification instructions for clock mechanism
NOTE: These instructions are for the wall clock that is available as a kit together with the Vetinari Clock board. If you are using another clock, the instructions will be slightly different, but the tips we outline here should still be valid.
Be careful when modifying the clock mechanism. It is easy to accidentally break parts or leave some gears without a good connection.
Most problems with bad timekeeping are caused by improper modification.
Required tools
- Flat screwdriver
- Digital camera
- Glue gun or superglue
- A soldering iron
- Solder
Modification Guide

Step 1 - Removing front cover
The first step is to remove the front cover of the clock.
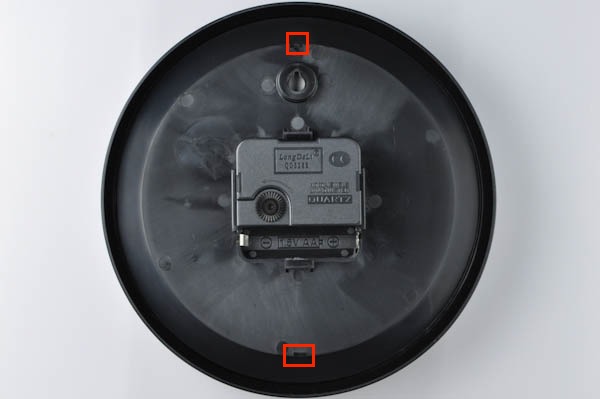
Turn the clock over. There are three holes on the top left, top right and bottom side of the clock that the front cover snaps into. Carefully insert the flat screwdriver in each hole and push the tabs out.
It should now be possible to remove the front cover.
Step 2 - Removing the clock hands
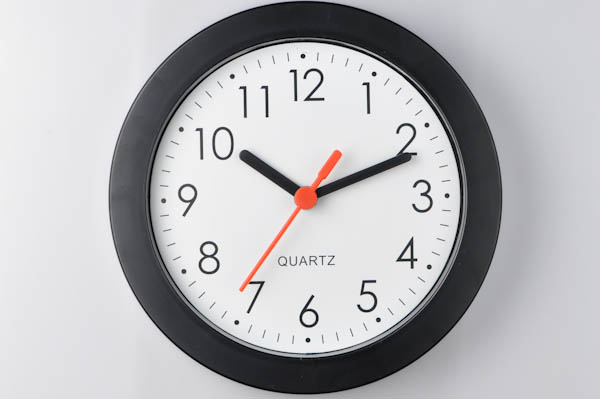
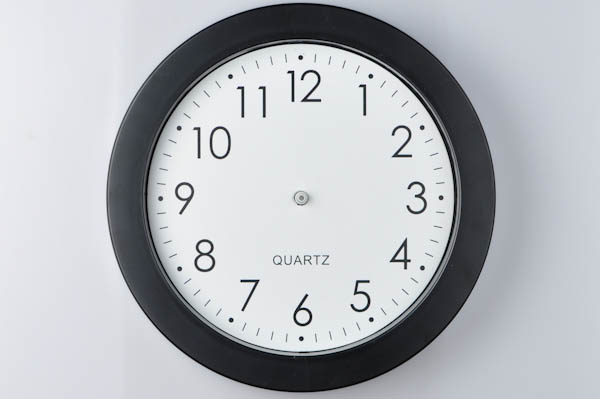
Carefully pull out the three clock hands, starting with the outer one (second indicator), then the middle one (minute indicator) and finally the inner one (hour indicator).
Don't pull too hard, but carefully wiggle the hands to make them come loose.
Step 3 - Removing the clock mechanism
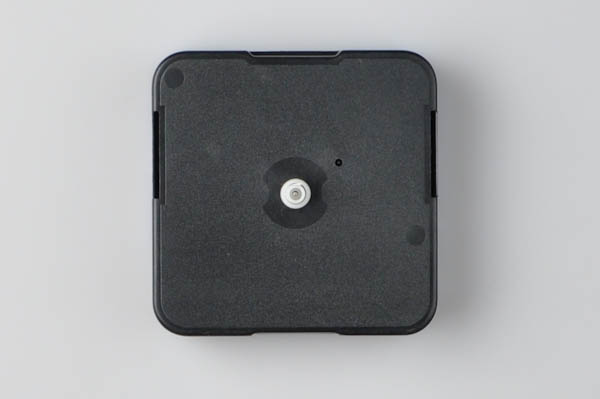
Turn the clock over, and use your flat screwdriver to loosen the tabs that hold the clock mechanism in place. Pull the clock mechanism out
Step 4 - Opening the clock mechanism
Again, use the flat screwdriver to carefully loosen the cover of the clock mechanism. Be sure hold it so that the hole where the clock hands were attached is pointing down. Do this very slowly and carefully, since the tabs may break off otherwise.
Be very careful when you remove the lid, so that the gears inside don't fall out or come loose.
Once the cover is removed, do not put the mechanism flat on a table as the clock hand spindle will force all the gears to fall out.
To rest the mechanism properly, put it on the top of the clock face so that the spindle goes through the hole
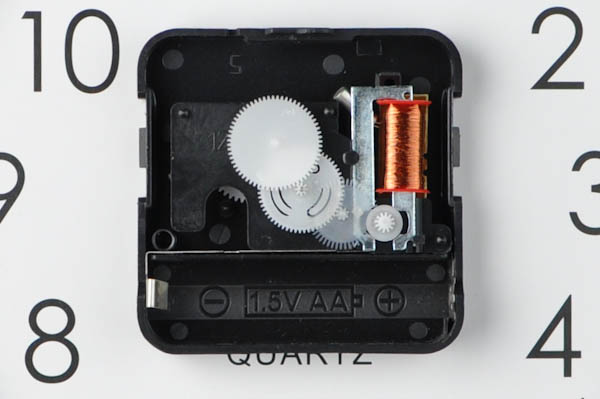
Step 5 - Removing the gears
Now it is time to remove the gears. It is very critical to do this step slowly so that you are able to put the clock back together in the same way after you are finished with your modfifications.
(If you are modifying a clock mechanism that is different than the one that came with the kit, we recommend using a digital camera to take one picture for each gear you remove, as this will make it easier to reverse the process properly afterwards.)


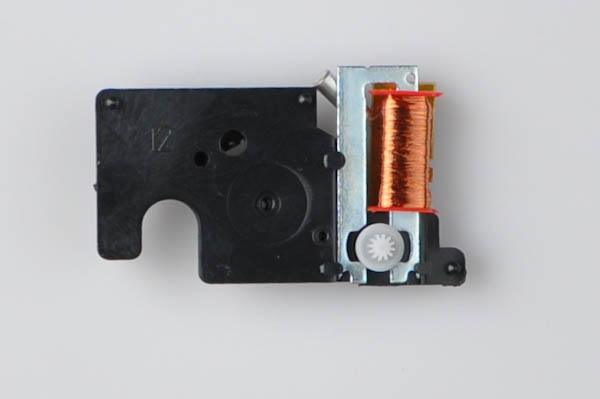
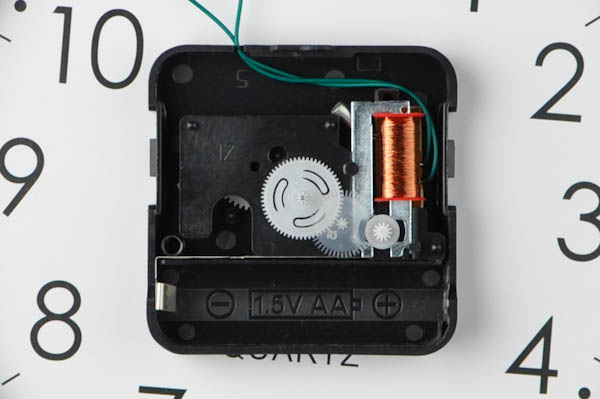
Step 6 - Modifying the mechanism
Once you have removed the gears, it should be possible to remove the logic board.

Find the two green wires and solder to the points indicated in the picture below.


Step 7 - Reassembly
Now, reassemble the mechanism, making sure that the gears are oriented properly and that they fall into place.
(If you took pictures, follow them in reverse.)


Once the gears are back in place, carefully close the lid.

IMPORTANT: At this point, insert one AA battery into the battery compartment of the mechanism. You should hear the clock ticking at this point. If not, it means that there is a problem with the gears, most likely caused by the reassembly.
Open the mechanism again, and try to re-insert all the gears.
Once the test is complete, remove the battery, then re-attach the clock mechanism box to the back of the clock, then turn it over and re-attach the clock hands, hour indicator first, then minute indicator, then second indicator.
Make sure the hands click into place properly, but be careful not to push too hard as you may damage the clock mechanism
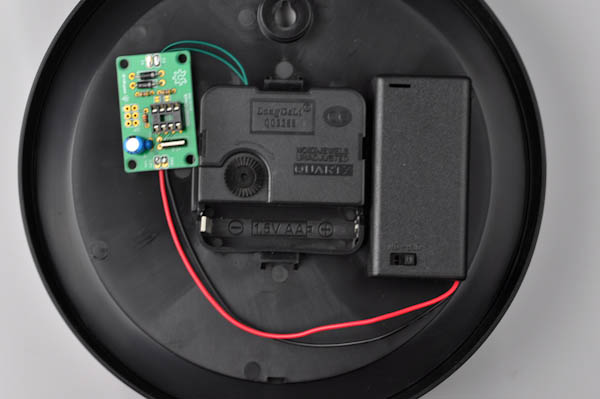
Step 8 - Attaching the PCB board
Solder the two green wires to the pin holes named X1 and X2 on the PCB board. Polarization doesn't matter.

Now insert two AA batteries into the battery box and turn the switch to ON! (The battery compartment of the mechanism should remain empty!)
The second hand should now start moving erratically!
The clock is set using the dial on the back of the mechanism.
Let the clock run for a couple of minutes to make sure all the hands move properly.
Step 9 - Finishing touches
Use a glue gun or super glue to attach the PCB board and battery box on the backside of the clock/
CONGRATULATIONS! Your Vetinari Clock is now complete!