Features
The main function of the VFD Modular Clock is to show time, but it has many other neat functions as well.
Battery backup. Even if you unpower the clock, it will still keep time, and will remember the correct time the next time you turn it on.
Alarm
GPS. If you got your clock with the GPS option, your clock will be able to set itself to the correct time automatically.
Four Letter Word Generator. Based on a word association dictionary, the four letter word mode will show you a new word every second.
Open Source Firmware. The firmware is available on github and in mbed.org. By creating an account on developer.mbed.org, you can easily access the firmware, make modifications and download the
Hackable with Lots of space. The 64k microcontroller has around 30k of memory free, leaving plenty of space to experiment with new features.
Firmware Hacking
The firmware is based on mbed. The easiest way to start playing with the firmware is to do this:
Step 1
Go to developer.mbed.org and create an free account.
Step 2
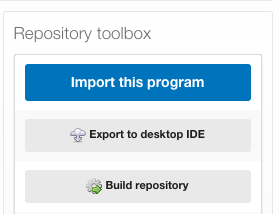
Go to this page and click "Import this program" to import the firmware into the online editor.
Step 3
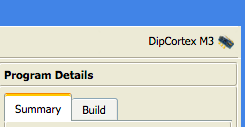
Make sure that the processor is set to "DipCortex M3". If not, click on the current processor and then click the "Add Platform" and choose "DipCortex M3" in the list.
Step 4

Hit compile!
The program will now be compiled, and you will receive a file called vfd_modular_clock_lpc1347.bin on your computer.
Step 5
Set the board into ISP mode. To do this, first remove the power, then press and hold the rightmost button and insert power. Then release the button. There will now be a new drive mounted on your computer, called CRP DISABLD.
Copy vfd_modular_clock.bin to the CRP DISABLD drive.
How you do this depends on the operating system.
On Windows, simply using Explorer to drag the file works well.
On Linux or OS X systems, a similar process will not generally work. Instead, open a terminal and use the dd command:
dd of=/Volumes/CRP\ DISABLD/firmware.bin conv=notrunc if=vfd_modular_clock_mbed_lpc1347.bin
After the copy completes, cycle power. Now the clock should come up with the new firmware.
Advanced Firmware Hacking
Mbed also supports offline compilers. You can export the firmware from the mbed IDE, and compile it elsewhere.
Keil uVision
This is by far the easiest method, but it only works on Windows, and with some limitations.
First of all, Keil uVision is a very expensive commercial compiler. There is a free version available, but it is limited to 32k programs. The clock firmware is larger than this, so to test and debug it in the free version of uVision, you will need to turn off some features. See the file global.h for this.
GCC
It is also possible to export to the ARM gcc toolchain. This will work on either Windows, Mac or Linux. There are several ways of setting up a GCC toolchain. One method is to install LPCXpresso, which is a special version of Eclipse that comes with a toolchain installed. If you add the path to it to your PATH variable, you can use all the gcc commands from the command line too.
Once you have the toolchain set up, you can just issue a Make request to create the binary file.
The code produced by GCC is not as good as the one produced by uVision (the mbed online IDE also uses uVision behind the scenes), so the file will be a bit bigger.
Debugging
The board does not include a debugger, but there is a JTAG header on it. This is the small 1.27mm pitch 2x5 connector you can see on the board. A stand-alone debugger like LPCLINK 2, or any of the new Arduino form-factor LPCXpresso boards will work well with the LPC1347 processor.
If you are using uVision, you should be able to use a LPCLINK 2 programmer to debug directly from within the IDE. LPCLINK has two alternate firmwares available, and to work directly with uVision, you will need to use the CMSIS-DAP firmware. The new LPCXpresso boards, such as LPCXpresso 1549 come with the CMSIS-DAP firmware already set up, so that is probably the easiest choice.
For most other debugging types, you are mostly limited to Windows. There are several possibilities, but we haven't had much luck with either of these options yet. If you can provide a good way of getting any of these methods to work, please let us know:
LPCXpresso - mbed provides LPCXpresso export possibilities for several different LPC microcontrollers, but unfortunately, this option is not available for the LPC1347 processor yet. The processor IS supported by the LPCXpresso IDE, so it should technically be possible for this to work. Debugging in LPCXpresso works well with LPC-Link, and we have done this for many of the larger processors, such as LPC1756 and LPC1549.
emblocks - An exporter for this Windows IDE that is also GCC-based is available. With it, you can easily develop your program from within the emblocks IDE, but there is no profile available for debugging the LPC1347 processor, so this would need to be set up from scratch.
Embedded GCC - This exports just the bare source code and a makefile. It is easy to compile the program like this, but debugging is trickier. Two options for debugging with gdb are openocd and pyOCD, but again debugging support for LPC1347 seems to be difficult.
Clock setting
Button functions
TIME MODE
Time mode is the default mode, which shows the current time. There are three different display modes, that can be toggled by button 2. You can also enter FLW mode by pressing button 3, or toggle alarm on/off by holding button 3 for a few seconds.
In Time mode, button 1 enters menu.
1: Activate menu 2: Change display mode 3: Toggle FLW mode Toggle Alarm on/off (long press)
FLW MODE
FLW mode shows four letter words continuously. This mode is only available when there is a Four Letter Word EEPROM chip inserted into the main PCB board. This is the large DIP-8 chip.
FLW mode will be in censored mode if the menu setting for FLW is either OFF or ON. If it is FULL, the uncensored mode will be used.
To exit FLW mode, press any button.
If the AUTODATE setting is ON, time will be shown for 10 seconds every minutes, followed by the current date and time scrolling.
MENU MODE
The menu is entered from TIME MODE by pressing button 1. If you do not make any selection, it will time out after a few seconds.
In time setting mode, the menu will time out after 1 minute of inactivity.
1: Go to next menu item 2: Activate menu item / select value 3: Exit menu (or wait 3 seconds for timeout)
Set Time and Set Alarm:
When entering Set Time or Set Alarm, the button functionality is different:
1: Decrease Value 2: Increase Value 3: Next
First Hours will flash, allowing you to set the value by button 1/2. Press button 3 to go to minutes, and set the value by button 1/2. Finally, press button 3 to go to seconds (time setting only), set value, then exit menu by pressing button 3.
Set Time Display shows HH:MM:SS to set hours, followed by minutes, then seconds.
Set Alarm Display shows AL HH:MM to set hours, then minutes. Setting alarm time does not toggle alarm on/off. To toggle alarm, hold button 3 when the clock is running normally.
24H Toggle between 24 hour display and 12 hour display
BRITE Set display brightness between 1 (lowest) and 10 (brightest)
YEAR Set the current year
MONTH Set the current month
DAY Set the current day of month
GPS Toggle GPS on/off. If your clock does not have a GPS module, this setting has no effect.
There is a LED labled FIX on the PCB board. This will blink on and off until the GPS module can find a sattelite fix. This may take several minutes. If your module has not managed to find a fix after about 10 minutes, it probably means that the module cannot pick up a clear GPS signal. Try to move the clock closer to a window.
Once a GPS FIX is established, the FIX LED will turn off. If the GPS setting is ON, then the clock will scan data from the GPS signal, and once it receives a good set of data, it will set the clock accordingly. This will usually happen within one minute of receiving the GPS fix. After this, the clock will continue to set itself.
GPS ON overwrites any setting for TIME, YEAR, MONTH and DAY.
TZH Time zone in hours. This will be used to determine the time zone your clock is set to.
TZM Time zone in minutes. In most time zones, this will be zero.
DST Daylight Savings Time. Toggle to on to set daylight saving time.
AUTODATE Automatic Date Scrolling. With this set to on, the current date will scroll across the screen once per minute.
FLW Toggle FLW. OFF - No FLW is shown in clock mode ON - Censored FLW is shown in clock mode FULL - Uncensored FLW is shown in clock mode
The FLW is shownd once a minute for about 8 seconds.
It is also possible to activate FLW mode by pressing Button 3 in TIME mode. This will show FLW words continuously.